Understanding Your Laptop Battery
When considering a laptop battery replacement, it is essential to understand the different battery types commonly used in laptops. The two primary types are lithium-ion (Li-ion) and lithium polymer (LiPo). Lithium-ion batteries are widely favored for their high energy density, lightweight nature, and ability to retain charge over multiple cycles. They are typically found in many consumer electronics, including laptops, due to their performance and longevity. Conversely, lithium polymer batteries, while more flexible in shape and lighter, tend to have lower energy density and are often seen in thinner and lighter laptop designs.
Identifying the specific battery type in your laptop model is crucial for a successful replacement. Most manufacturers will label their batteries with the type and model number. This information can usually be found on the back of the laptop or within the device itself, often listed in the specifications section of the user manual or on the manufacturer’s website. Knowing the battery specifications, such as voltage, capacity, and physical dimensions, ensures that you select a compatible replacement battery, thereby maintaining optimal laptop performance.
Several signs may indicate that your laptop battery requires replacement. One common indicator is reduced performance, often noticeable when the laptop cannot hold a charge for a reasonable duration. Users might also observe the laptop shutting down unexpectedly or needing an outlet connection despite a recent full charge. Another critical sign is battery swelling, which can pose safety risks and should be addressed immediately by replacing the battery. Recognizing these symptoms is vital for prolonging the lifespan of your device and ensuring efficient performance.
Gathering Necessary Tools and Materials
Before embarking on the task of replacing your laptop’s battery, it is crucial to gather all the necessary tools and materials to ensure a smooth and efficient process. The most fundamental tool you will need is a set of screwdrivers, specifically a precision set that includes Phillips and flat-head screwdrivers. These will assist in removing the screws that secure the laptop’s casing and battery compartment. Additionally, having a plastic spudger or pry tool can be beneficial for gently prying open the laptop without causing damage to the casing.
To prevent any static electricity from damaging your laptop’s internal components, it is highly recommended to use an anti-static wrist strap. This tool grounds you while you work, protecting sensitive electronic parts from static discharge. If you do not have an anti-static wrist strap, make sure to work on a non-static surface and regularly touch a grounded metal object to dissipate any built-up static electricity.
In terms of materials, the most critical item is the replacement battery. It is essential to obtain a battery that is compatible with your specific laptop model. You can usually find this information in your laptop’s user manual or manufacturer’s website. When purchasing a new battery, it is advisable to choose reputable sources, such as authorized retailers or well-reviewed online platforms. This ensures you acquire a high-quality battery that meets safety standards, reducing the risk of future malfunctions.
Overall, taking the time to gather the correct tools and a compatible battery beforehand will significantly lead to a more successful laptop battery replacement experience. Being well-prepared not only enhances safety but also contributes to the longevity and performance of your laptop after the battery exchange.
Preparing Your Laptop for Battery Replacement
Before initiating the battery replacement process for your laptop, it is crucial to prepare adequately. Proper preparation ensures a smooth transition and minimizes the risk of damaging your device or losing important data. First and foremost, start by backing up your data. This can involve transferring essential files to an external hard drive, using cloud storage, or creating a system image. Doing so will safeguard your information in case an unexpected issue arises during the battery replacement.
Once your data is securely backed up, the next step is to power down the laptop completely. This means shutting it down through the operating system and ensuring that it is not in sleep or hibernate mode. A complete shutdown prevents any electrical issues during the replacement process that can potentially cause harm to the device’s internal components.
After shutting down, unplug your laptop from any external power sources. This step is vital for ensuring your safety and preventing electrical shocks while working on the laptop’s internals. Additionally, remove any peripherals connected to the laptop, such as USB drives, external mice, keyboards, or monitors. This not only helps in focusing on the battery replacement but also reduces the likelihood of accidents that can occur from tripping over cables or knocking against devices.
Another important consideration is to find a suitable workspace. Choose a clean, static-free environment to work on your laptop. Static electricity can damage sensitive components within your device, leading to functionality issues. Use an anti-static wrist strap if available or work on a non-static surface, such as a wooden table. By taking these preparatory steps, you will set the stage for a successful laptop battery replacement.
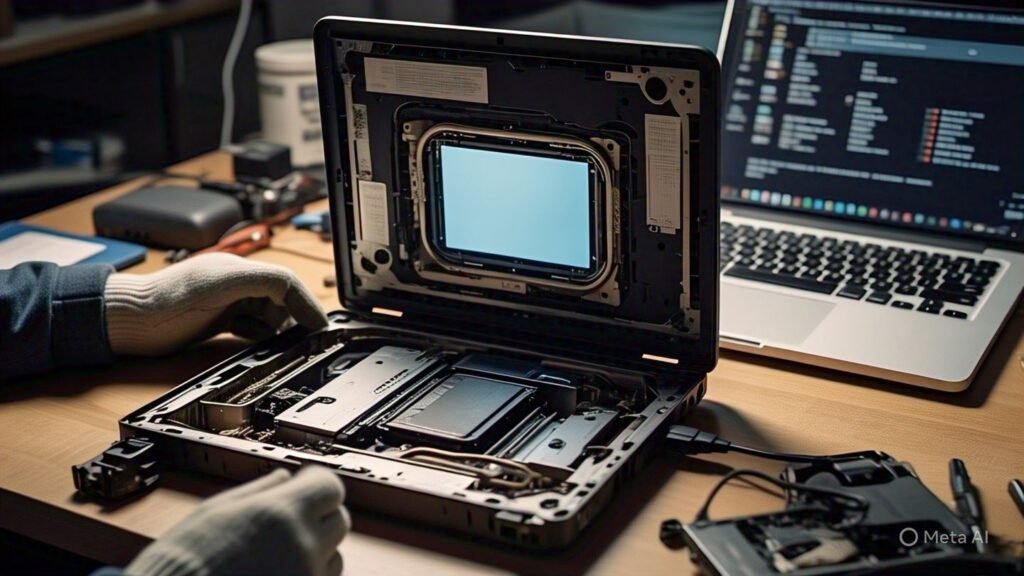
Opening Your Laptop Case
Opening your laptop case is a crucial first step in replacing the battery. This process varies significantly between different laptop models, so it’s important to consult your manufacturer’s guidelines or a model-specific manual for precise instructions. Begin by ensuring that your laptop is powered off and unplugged from any power source. Additionally, it is advisable to remove any connected peripherals and accessories to streamline the process.
To start, you will need a suitable set of tools; typically, a small Phillips screwdriver will suffice for most laptops. Carefully inspect the underside of your device to locate the screws that secure the case. Some laptops have hidden screws, often concealed beneath rubber feet or stickers. Use a plastic spudger or a similar tool to gently pry these elements off if necessary. Keeping track of where each screw comes from is essential to reassemble your laptop correctly later.
Once you have identified and removed all the visible screws, you may need to detach clips that hold the case together. This is where caution is crucial; using too much force can crack or break the plastic casing. Slowly work your way around the edges of the laptop case, applying slight pressure to disengage the clips. It might be helpful to refer to online visual aids or diagrams that illustrate the specifics of your model’s opening process. These resources can show you the exact locations of screws and clips, reducing the risk of error during disassembly.
As you separate the case from the base, gently lift it, as many laptops have internal components connected that need to be handled with care. Ensure that you do not force the case apart, as this may lead to damage. Your patience during this process can ultimately help maintain the integrity of your laptop and facilitate a smooth battery replacement.
Removing the Old Battery
To begin the process of replacing your laptop’s battery, it is essential to first remove the old battery safely and efficiently. Start by ensuring that your laptop is powered down and completely disconnected from any electrical source. Unplug the power adapter and, if applicable, remove any external peripherals.
Locate the battery compartment on your laptop, which is typically situated on the underside of the device. For some models, you may need to remove a panel or cover to access the battery. If your laptop has a removable battery, look for latches or clips that hold it in position. Gently slide or press these mechanisms to release the battery. For laptops with built-in batteries, you may need to unscrew the retaining screws that secure the battery to the chassis.
Once you have access, identify the battery connector, which is usually a small cable linked to the motherboard. Carefully pull the connector away from the motherboard without applying too much force. This step is critical as it helps prevent damage to both the connector and the motherboard. If the connection proves challenging, do not force it; instead, double-check for any additional securing clips or screws that may be holding the connector in place.

When removing any screws, it is advisable to keep them in a secure location to avoid losing them. Use an appropriate screwdriver to prevent stripping the screws. As you remove the battery, be mindful of static electricity. Ground yourself by touching a metal surface to prevent static shock that may harm your laptop’s internal components.
In the event that you encounter difficulty during this phase, refer to your laptop’s manual for model-specific instructions. Following these guidelines carefully will help ensure a safe and effective removal of the old battery, paving the way for a successful installation of the new one.
Installing the New Battery
Once you have acquired the appropriate replacement battery for your laptop, the installation process can begin, ensuring that the new component functions optimally. Begin by positioning the new battery into the designated compartment of the laptop. It is crucial to ensure that the battery’s connectors are aligned with the corresponding sockets on the motherboard. This step is pivotal, as a misalignment can lead to poor connectivity or damage to the laptop’s internal components.
Next, gently connect the battery to the motherboard. Carefully insert the battery connector, ensuring that it fits snugly into the socket. A secure connection is essential for the battery to communicate effectively with the laptop’s power management system. If you encounter resistance when connecting the battery, check to ensure that no pin or connector is bent or obstructed. Taking the time to verify this will mitigate potential problems that could arise from improper installation.
After securing the connection, the next step is to stabilize the battery within the laptop’s housing. If your laptop design includes screws for securing the battery, utilize the appropriate screwdriver to fasten each screw, ensuring they are tightly in place but not overtightened, as this might strip the threads or damage the battery casing. Confirm that all screws are replaced to prevent any movement of the battery during operation, which could lead to damage over time.
Finally, perform a visual inspection to ensure all connections are secure and that there are no loose cables or components within the laptop. Once everything is in place, you can proceed to close the laptop casing. Taking these steps seriously ensures a successful installation of your new battery, contributing to the longevity and efficiency of your laptop.
Reassembling Your Laptop

After successfully installing your new laptop battery, the next critical step is to reassemble the laptop. This process should be approached systematically to ensure that all components are properly connected and the device is securely closed. Begin by realigning the laptop case, ensuring that all parts fit together as they were originally. This may involve gently pressing the two halves of the casing until you hear or feel a click, indicating that they are locked into place.
Once the casing is aligned, reconnect any components that were previously detached during the battery replacement process. This typically includes the keyboard, touchpad, or any other peripheral elements that were removed. Carefully check the connections to ensure they are secure but avoid excessive force, as this may lead to damage. Each component should slide back into position smoothly, and it is advisable to refer to the earlier disassembly steps to confirm that each connection is reestablished correctly.
After all components are securely reattached, the next step is to reinstate the screws that hold the laptop casing together. It is important to use the correct screws in their designated locations, as this will provide the necessary structural integrity to the laptop. Begin with the larger screws, which typically support the main casing, and then use the smaller screws for any additional panels. Make sure each screw is tightened adequately, but avoid overtightening as this may strip the threads or crack the casing.
Before finalizing the reassembly, conduct a thorough inspection of the laptop’s interior. Verify that no tools, screws, or small components have been inadvertently left inside. Closing the laptop with foreign items can result in internal damage or malfunctions. Once you are confident that everything is in order, you may proceed to close the laptop case completely, ensuring all latches are properly secured.
Testing the New Battery
Once you have successfully reassembled your laptop, the next critical step is to test the new battery. Begin by reconnecting the power adapter and pressing the power button to turn on your laptop. Observe if the laptop powers up without any issues. If the laptop does not start, double-check that the battery has been installed correctly and that all connection points are secure.
Assuming the laptop powers on successfully, the next step is to check the battery functionality. Navigate to the operating system’s battery settings. For Windows users, this can generally be found in the “Control Panel” under “Power Options.” For macOS users, access this in “System Preferences” under “Battery.” Ensure that the new battery is recognized by the system and check the percentage charge indicated in the respective settings.
Once your laptop is booted, unplug the power adapter to see if the device runs on battery power. If the laptop functions properly without being plugged in, it’s a good indication that the new battery is operational. Next, plug the power adapter back in and watch for the battery charging indicator light. Most laptops will show an LED light or an on-screen message indicating that the battery is charging. If these indicators do not engage, you may need to revisit the connections.
To monitor battery health over time, consider regularly checking the battery status in your operating system settings. Look for any considerable drops in capacity or performance, as these may indicate issues with the new battery. Utilizing software tools designed to analyze battery health can help provide further insights. Pay attention to any swelling or unusual heat; these symptoms early can help prevent further problems and extend the lifespan of your laptop battery.
Troubleshooting Common Issues
After replacing your laptop’s battery, it is not uncommon to encounter a few issues. Understanding how to troubleshoot these problems can save you time and frustration. One of the most prevalent issues is the laptop not powering on at all. If this occurs, first check that the battery is properly seated in its compartment. Remove the battery and reinsert it, ensuring that the contacts are aligned correctly. Additionally, verify that the laptop is connected to a functional power source; sometimes, the charger may not be working, causing the battery to appear uncharged.
Another frequent issue that users face is that the battery does not charge despite being connected to the power supply. In this case, it is advisable to check the charging cable and adapter for any signs of damage. A faulty adapter could prevent the battery from receiving the necessary power. You may also want to try using a different power outlet to rule out any electrical issues. If the battery still does not charge, ensure that it is compatible with your laptop model as using an incompatible battery can often lead to charging problems.
If your operating system fails to recognize the new battery, this can create additional frustration. In such scenarios, a simple reboot may resolve the issue. However, if restarting does not work, check for any available system updates that might include drivers for battery management. Another method is to access the Device Manager and uninstall the battery driver, which will then prompt the operating system to reinstall it upon reboot. If the battery remains unrecognized after all these steps, consider testing it in another compatible laptop or consulting with a technician to determine if the battery itself is defective.
In conclusion, troubleshooting after a laptop battery replacement involves careful examination of connections, compatibility, and system settings. Keeping these steps in mind can help identify and resolve any issues effectively.